TL;DR: To add an email account to iPhone, open Settings, tap Mail, select Accounts, then Add Account. Choose your email provider or select Other for custom accounts. Enter your email address and password, then tap Next. Your iPhone will verify the credentials and sync your emails automatically within seconds.
Frequently Asked Questions
How do I add an email account to my iPhone?
Open Settings on your iPhone, tap Mail, then select Accounts and Add Account. Choose your email provider (Gmail, Yahoo, Outlook, etc.) or select Other for custom accounts. Enter your email address and password, then follow the prompts. Your iPhone will automatically configure the settings. Once verified, your emails will sync to the Mail app within minutes.
How do I add an ATT.net email account to my iPhone?
Go to Settings > Mail > Accounts > Add Account. Select Other, then Add Mail Account. Enter your name, full ATT.net email address, password, and a description. Tap Next. For incoming mail server, use imap.mail.att.net (IMAP) or inbound.att.net (POP3). For outgoing, use smtp.mail.att.net. Ensure SSL is enabled and tap Save to complete setup.
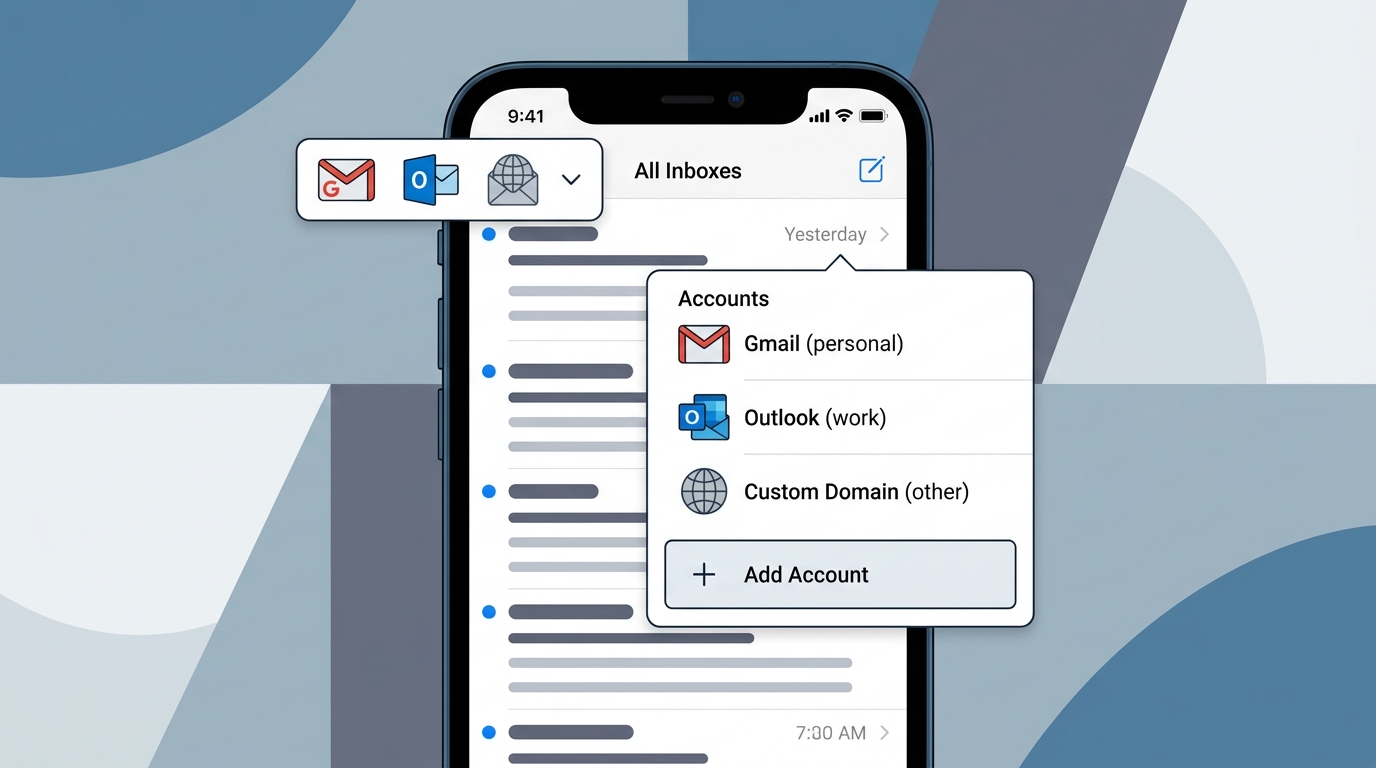
Can I add multiple email accounts to my iPhone?
Yes, you can add unlimited email accounts to your iPhone. Go to Settings > Mail > Accounts and tap Add Account for each email you want to add. Your iPhone supports Gmail, Yahoo, Outlook, iCloud, and custom email providers. All accounts will appear in the Mail app, and you can switch between them easily or view a unified inbox.
How do I add a GoDaddy email account to my iPhone?
Open Settings > Mail > Accounts > Add Account, then select Other. Choose Add Mail Account and enter your GoDaddy email and password. For manual setup, use your domain’s mail server settings: incoming server (IMAP/POP) and outgoing server (SMTP) provided by GoDaddy. Enable SSL, use port 993 for IMAP or 465 for SMTP, and authenticate with your full email address.
Why won’t my email account add to my iPhone?
Common reasons include incorrect password, wrong server settings, or disabled IMAP/POP access. Verify your email credentials by logging in through a web browser first. Check if your email provider requires app-specific passwords (Gmail, Yahoo). Ensure you have a stable internet connection. Try removing and re-adding the account, or contact your email provider to confirm correct server settings and ports.
How do I add a Gmail account to my iPhone Mail app?
Go to Settings > Mail > Accounts > Add Account and select Google. Enter your Gmail address and tap Next. Sign in with your Google password and complete two-factor authentication if enabled. Grant iPhone permission to access your account. Choose which services to sync (Mail, Contacts, Calendars), then tap Save. Your Gmail will now appear in the iPhone Mail app.
What information do I need to manually add an email account to iPhone?
You’ll need your full email address, password, incoming mail server address (IMAP or POP), outgoing mail server (SMTP), and the correct port numbers. Most providers require SSL encryption. For IMAP, typical ports are 993 (incoming) and 465 or 587 (outgoing). Your email provider’s support documentation will have these specific server settings if automatic configuration fails.
How do I add a Hotmail or Outlook email account to my iPhone?
Open Settings > Mail > Accounts > Add Account and select Outlook.com (works for Hotmail too). Enter your full Hotmail or Outlook email address and tap Next. Input your password and sign in. If you use two-factor authentication, complete the verification. Choose which data to sync, then tap Save. Your Hotmail/Outlook emails will sync automatically to the Mail app.
Introduction: Mastering Email Setup on Your iPhone
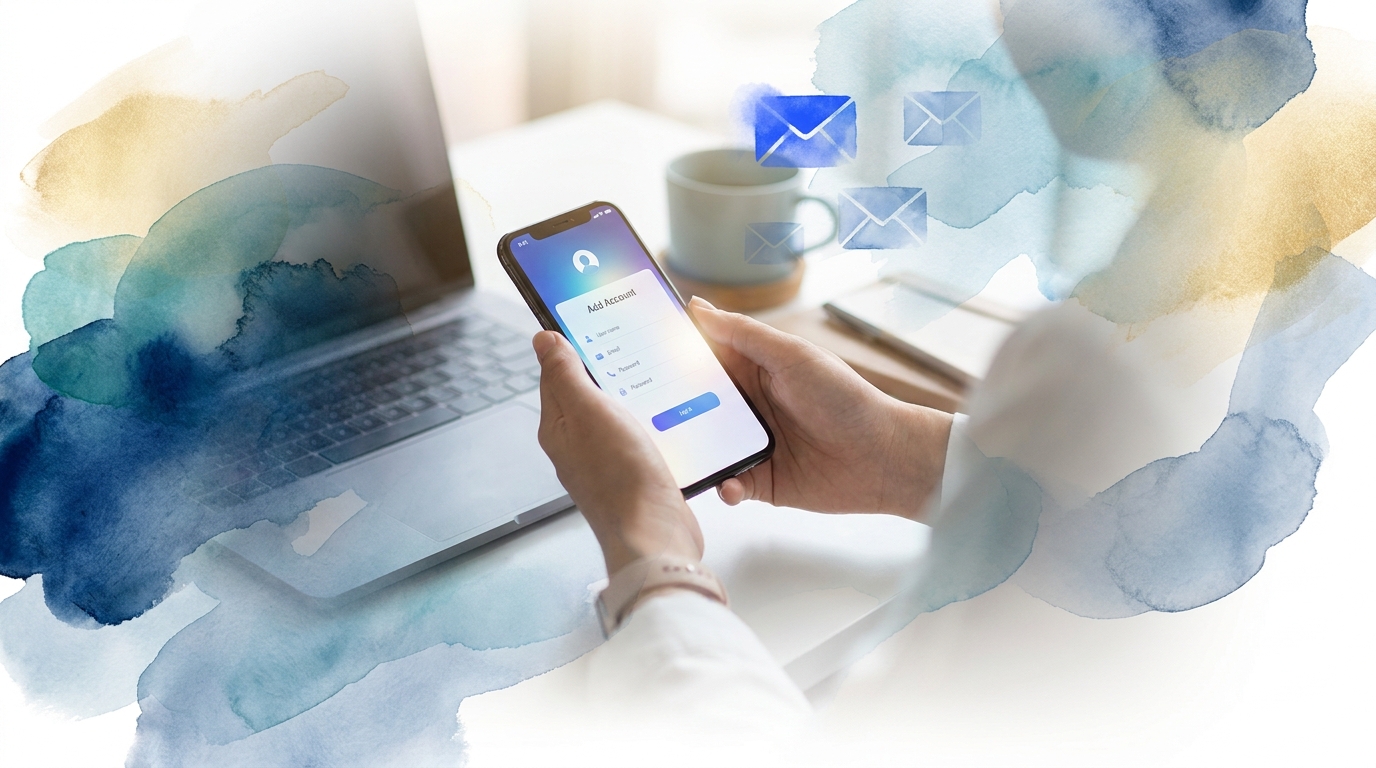
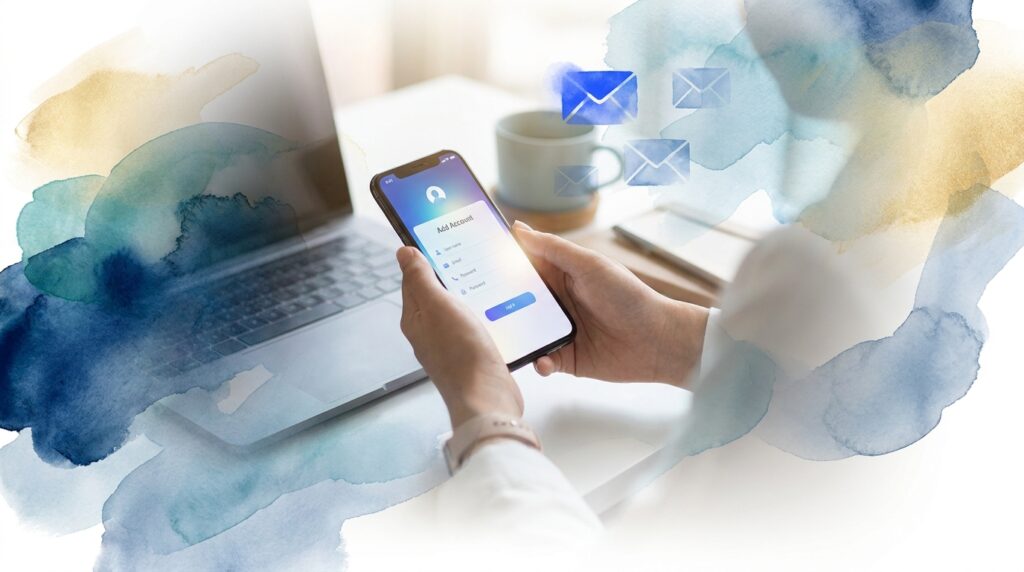
Setting up email accounts on your iPhone is a fundamental skill that every professional needs to master. Whether you’re managing multiple business accounts or simply want to consolidate your personal communications, knowing how to add email account to iPhone ensures you stay connected wherever you go. 📱
In today’s fast-paced business environment, having instant access to your email is crucial. Sales teams, marketing professionals, and business development representatives rely on mobile email access to respond quickly to prospects and maintain momentum in their outreach campaigns.
This comprehensive guide walks you through every step of adding various email accounts to your iPhone, from popular providers like Gmail and Yahoo to business solutions like GoDaddy and AT&T. You’ll learn troubleshooting techniques, security best practices, and optimization tips to ensure your mobile email experience is seamless and productive.
Understanding iPhone Email Account Types
Before diving into the setup process, it’s important to understand the different types of email accounts your iPhone supports. This knowledge helps you choose the right configuration method and avoid common setup issues. 🔍
IMAP vs POP3: What’s the Difference?
Your iPhone primarily uses IMAP (Internet Message Access Protocol) for email synchronization. IMAP keeps your emails stored on the server, allowing you to access them from multiple devices while maintaining consistency across all platforms.
POP3 (Post Office Protocol 3) downloads emails to your device and typically removes them from the server. While still supported, IMAP is the recommended protocol for modern email management, especially for professionals who check email on multiple devices throughout the day.
Supported Email Providers
iOS natively supports major email providers with automatic configuration:
- Gmail: Google’s email service with robust spam filtering and integration
- Yahoo Mail: One of the oldest webmail services with reliable mobile support
- Outlook/Hotmail: Microsoft’s email platform with calendar integration
- iCloud Mail: Apple’s native email service with seamless iOS integration
- Exchange: Enterprise email solution for business environments
- Custom domains: Business emails through providers like GoDaddy and AT&T
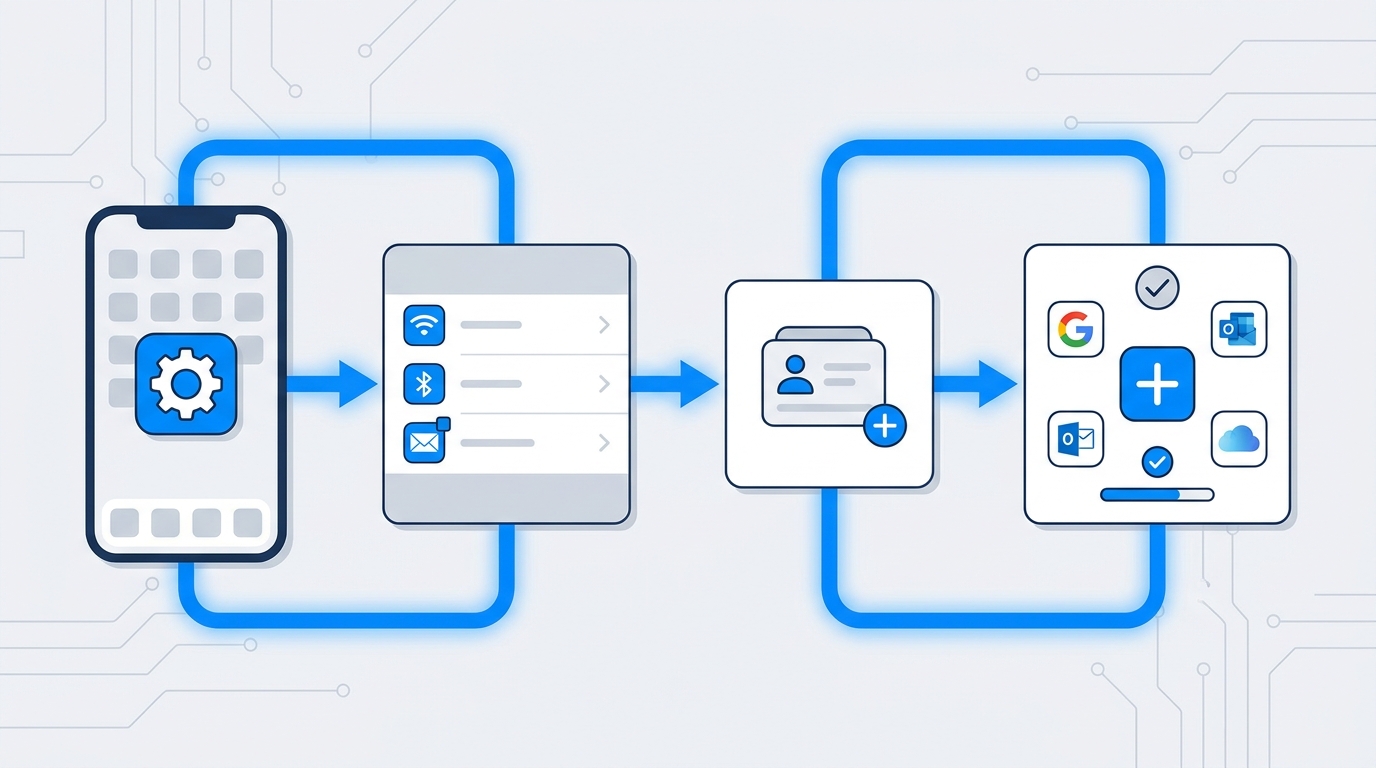
How to Add Email Account to iPhone: Step-by-Step Guide
The process of adding an email account to your iPhone is straightforward when you follow these detailed steps. We’ll cover both automatic and manual setup methods to ensure you can configure any email provider successfully. ✅
Method 1: Automatic Setup for Popular Providers
For major email providers like Gmail, Yahoo, and Outlook, iOS offers streamlined automatic setup that requires minimal configuration.
- Open Settings: Tap the Settings app on your iPhone home screen
- Navigate to Mail: Scroll down and select “Mail” from the settings menu
- Select Accounts: Tap “Accounts” to view your current email accounts
- Add Account: Tap “Add Account” to begin the setup process
- Choose Provider: Select your email provider from the list (Google, Yahoo, Outlook, etc.)
- Enter Credentials: Input your email address and password
- Enable Services: Choose which services to sync (Mail, Contacts, Calendars, Notes)
- Save Settings: Tap “Save” to complete the setup
This automatic method works seamlessly for most users and typically takes less than two minutes to complete. If you’re setting up a Gmail email account, the process is particularly smooth thanks to Apple’s deep integration with Google services.
Method 2: Manual Setup for Custom Email Accounts
When working with custom business domains or less common email providers, you’ll need to manually configure your account settings. This is especially relevant for GoDaddy and email setups or corporate email systems.
| Information Needed | Where to Find It | Example |
|---|---|---|
| Email Address | Your email provider | yourname@domain.com |
| Password | Your email account | Your secure password |
| Incoming Mail Server | Provider documentation | imap.domain.com |
| Outgoing Mail Server | Provider documentation | smtp.domain.com |
| Port Numbers | Provider documentation | 993 (IMAP), 587 (SMTP) |
Follow these steps for manual configuration:
- Access Settings: Open Settings → Mail → Accounts → Add Account
- Select Other: Choose “Other” at the bottom of the provider list
- Add Mail Account: Tap “Add Mail Account” to begin manual setup
- Enter Basic Info: Input your name, email address, password, and account description
- Choose IMAP: Select IMAP (recommended) or POP as your account type
- Configure Incoming Server: Enter your incoming mail server hostname, username, and password
- Configure Outgoing Server: Enter your SMTP server details and authentication credentials
- Verify Settings: Tap “Next” and wait for iOS to verify your configuration
- Complete Setup: Tap “Save” once verification succeeds
Setting Up Specific Email Providers on iPhone
Different email providers have unique requirements and configuration steps. Understanding these nuances ensures a smooth setup experience regardless of which service you use. 📧
How to Add Gmail Email Account to iPhone
Gmail is one of the most popular email services, and understanding how i make new email accounts work on iOS is essential for professionals. The process for adding Gmail has evolved with enhanced security measures.
When you select Google as your provider, iOS redirects you to Google’s secure sign-in page. This OAuth authentication method is more secure than traditional password entry and allows Google to verify your identity through two-factor authentication if enabled.
After successful authentication, you can choose which Google services to sync with your iPhone. Most users enable Mail, Contacts, and Calendars for full integration. If you need help with Gmail email account create processes or recovery options, Apple’s Mail app supports Google’s account management features.
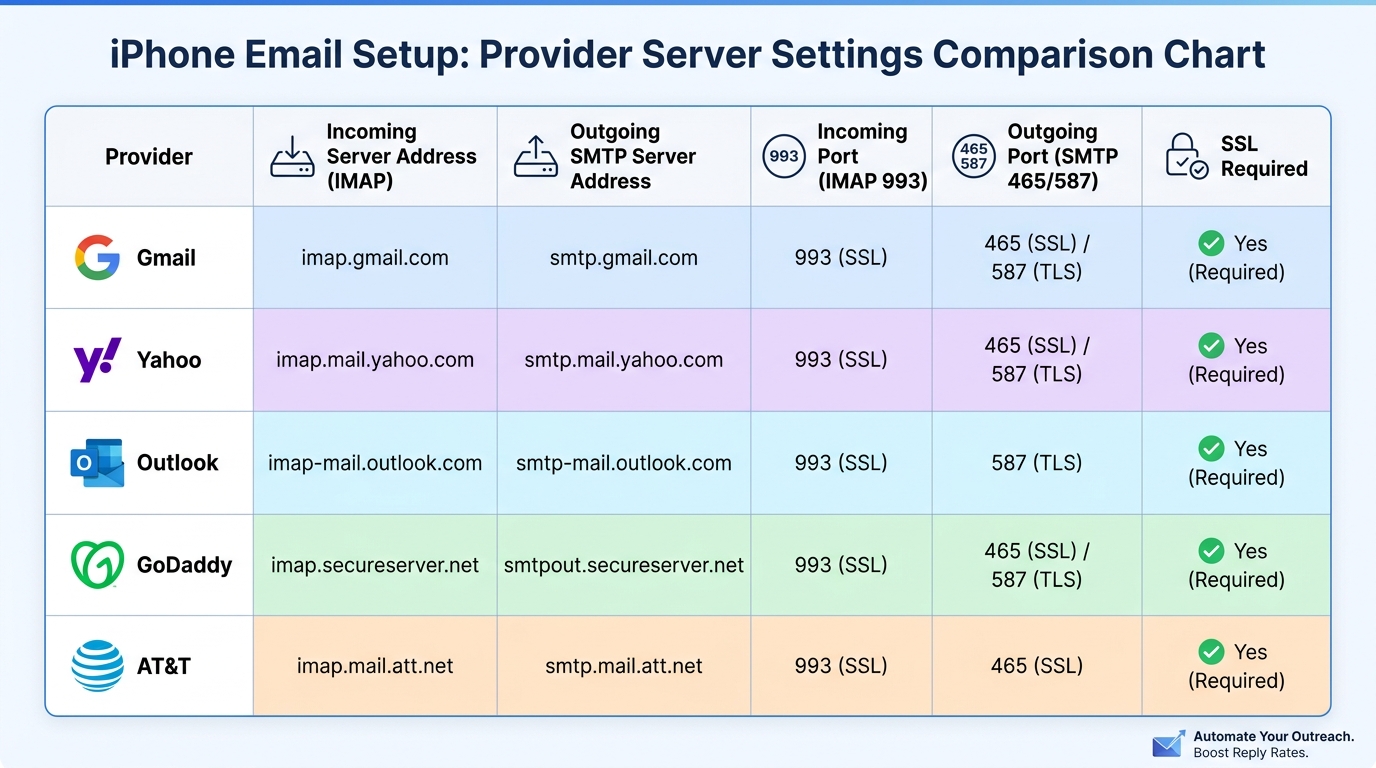
Configuring AT&T Email (email with att net)
AT&T email accounts require specific server settings that differ from standard consumer email services. For sign in for att email on your iPhone, you’ll need to use manual configuration with these settings:
- Incoming Server: imap.mail.att.net
- Incoming Port: 993 (SSL enabled)
- Outgoing Server: smtp.mail.att.net
- Outgoing Port: 465 or 587 (SSL enabled)
- Username: Your full AT&T email address
- Authentication: Password authentication required for both incoming and outgoing
AT&T requires SSL/TLS encryption for both incoming and outgoing mail, so ensure these security options are enabled during setup. If you’re having trouble with email with att net configuration, verify that your AT&T account is active and that you’re using the correct secure mail key rather than your account password.
Setting Up Yahoo Mail (my emails yahoo)
Yahoo Mail setup on iPhone is straightforward thanks to native iOS support. When accessing my emails yahoo on mobile, the automatic configuration handles most technical details.
However, Yahoo requires you to generate an app-specific password if you have two-step verification enabled. You cannot use your regular Yahoo password in third-party email apps for security reasons. Generate this special password through your Yahoo Account Security settings before attempting to add the account to your iPhone.
Adding Hotmail/Outlook Email (log into hotmail email)
Microsoft’s email services have undergone several rebranding changes, but the setup process remains consistent. To log into hotmail email on your iPhone, select “Outlook.com” from the account provider list.
Microsoft uses OAuth authentication similar to Google, redirecting you to a secure Microsoft login page. This method supports multi-factor authentication and provides better security than traditional password-only access. The integration includes access to your Outlook calendar, contacts, and tasks if you enable those services during setup.
Configuring GoDaddy Email Accounts
Business professionals often need to understand godaddy and email configuration for their custom domain accounts. GoDaddy provides both Workspace Email and Microsoft 365 options, each with different server settings.
For GoDaddy Workspace Email, use these manual configuration settings:
- Incoming Server: imap.secureserver.net
- Incoming Port: 993
- Outgoing Server: smtpout.secureserver.net
- Outgoing Port: 465 or 587
- SSL: Required for both incoming and outgoing
For detailed guidance on business email setup, check out this comprehensive GoDaddy and Email Setup guide that covers cold outreach success strategies alongside technical configuration.
Troubleshooting Common Email Setup Issues
Even with careful configuration, you may encounter issues when adding email accounts to your iPhone. Understanding common problems and their solutions saves time and frustration. 🔧
Authentication and Password Errors
The most frequent setup issue involves incorrect credentials or authentication failures. This often occurs when email providers require app-specific passwords instead of your regular account password.
If you receive an authentication error, verify these points:
- Double-check your email address and password for typos
- Confirm whether your email provider requires an app-specific password
- Verify that two-factor authentication isn’t blocking the connection
- Ensure your email account is active and not suspended
- Check if your email provider requires additional security settings
For Gmail users experiencing authentication issues, you may need to enable “Less secure app access” in your Google Account settings or generate an app password. Yahoo and Microsoft accounts almost always require app-specific passwords when two-step verification is enabled.
Server Connection Problems
Connection errors typically indicate incorrect server settings or network issues. When manually configuring accounts, even small typos in server addresses can prevent successful setup.
Troubleshooting steps for connection issues:
- Verify Server Addresses: Confirm incoming and outgoing server hostnames are correct
- Check Port Numbers: Ensure you’re using the correct ports (993 for IMAP, 587 or 465 for SMTP)
- Enable SSL/TLS: Most modern email providers require encryption
- Test Network Connection: Verify your iPhone has active internet access
- Disable VPN Temporarily: Some VPN configurations interfere with email setup
- Contact Provider: Verify server settings haven’t changed recently
Sync and Update Issues
Sometimes emails don’t sync properly even after successful setup. This can manifest as delayed message delivery, missing emails, or folders not appearing correctly.
To resolve sync problems:
- Navigate to Settings → Mail → Accounts → Fetch New Data
- Enable “Push” for real-time email delivery (if supported)
- Adjust fetch frequency for accounts that don’t support push
- Toggle the Mail switch off and on for the affected account
- Remove and re-add the account if issues persist
| Error Message | Common Cause | Solution |
|---|---|---|
| “Cannot Get Mail” | Server connection issue | Verify server settings and internet connection |
| “Username or Password Incorrect” | Authentication failure | Check credentials and app-specific password requirements |
| “SSL Connection Failed” | Encryption settings mismatch | Enable SSL and verify correct port numbers |
| “Cannot Send Mail” | SMTP configuration issue | Verify outgoing server settings and authentication |
Optimizing Email for Business and Sales Professionals
For sales teams, marketing professionals, and business development representatives, email configuration extends beyond basic setup. Optimizing your iPhone email settings enhances productivity and ensures you never miss critical communications. 💼
Managing Multiple Email Accounts
Professionals often juggle multiple email accounts—personal, business, and client-specific addresses. iOS allows you to add unlimited email accounts and manage them efficiently through unified or separate inboxes.
Best practices for multiple account management:
- Use Unified Inbox: View all emails in one place while maintaining separate sent folders
- Create VIP Lists: Flag important contacts for priority notifications
- Customize Notifications: Set different alert tones for different accounts
- Configure Signatures: Create unique signatures for each email account
- Set Default Account: Choose which account sends emails by default
For teams managing cold email lead generation campaigns, having proper mobile access to multiple accounts ensures you can monitor campaign performance and respond to prospects regardless of location.
Email Notification Management
Constant email notifications can disrupt productivity, but missing important messages hurts business. Finding the right balance is crucial for professionals who rely on mobile email.
Configure notifications strategically:
- Navigate to Settings → Notifications → Mail
- Choose notification style (banners, alerts, or none)
- Enable “Show Previews” selectively for privacy
- Configure sounds and badges per account
- Use “Deliver Quietly” for less critical accounts
- Set up Focus modes to manage notifications during meetings
Integration with CRM and Sales Tools
Modern sales professionals need their email to integrate seamlessly with their CRM inside sales tools and lead generation platforms. While iOS Mail doesn’t directly integrate with CRM systems, you can optimize your workflow through strategic app usage.
Consider these integration strategies:
- Use dedicated CRM apps alongside Mail for comprehensive customer views
- Forward important emails to your CRM’s email-to-lead feature
- Set up email rules to automatically categorize prospect communications
- Leverage iOS shortcuts to quickly create CRM entries from emails
- Sync contacts between your CRM and iPhone for unified communication
For cold email campaigns, tools like Meetbound help automate outreach while maintaining personalization at scale, complementing your mobile email setup for maximum efficiency.
Security Best Practices for iPhone Email
Email security is paramount, especially for business professionals handling sensitive client information and proprietary data. Implementing proper security measures protects both your personal information and your organization’s assets. 🔒
Enable Two-Factor Authentication
Two-factor authentication (2FA) adds an essential security layer to your email accounts. Even if someone obtains your password, they cannot access your account without the second authentication factor.
Enable 2FA for all your email accounts:
- Gmail: Use Google Authenticator or SMS verification
- Yahoo: Enable Account Key or SMS verification
- Outlook: Use Microsoft Authenticator app
- Business accounts: Follow your organization’s authentication requirements
When 2FA is enabled, you’ll typically need to generate app-specific passwords for your iPhone Mail app, as standard passwords won’t work with third-party email clients.
Use Strong, Unique Passwords
Password security remains fundamental despite advanced authentication methods. Each email account should have a unique, complex password that you don’t use elsewhere.
Password best practices:
- Use at least 12 characters combining letters, numbers, and symbols
- Avoid personal information like birthdays or names
- Never reuse passwords across different accounts
- Use iOS Keychain or a password manager to store credentials securely
- Change passwords regularly, especially after security incidents
Protect Your Device
Your iPhone itself represents a security vulnerability if not properly protected. Since email accounts remain logged in on your device, physical access to an unlocked iPhone grants access to all your email.
Essential device security measures:
- Enable Face ID or Touch ID: Biometric authentication provides quick, secure access
- Set Strong Passcode: Use a 6-digit or alphanumeric passcode
- Enable Auto-Lock: Set your iPhone to lock after brief inactivity
- Turn On Find My iPhone: Locate or remotely wipe your device if lost
- Keep iOS Updated: Install security updates promptly
- Review App Permissions: Ensure only trusted apps access your email data
Be Cautious with Public Wi-Fi
Accessing email over public Wi-Fi networks exposes your communications to potential interception. While most email providers use encryption, additional precautions protect your data on untrusted networks.
Public Wi-Fi safety tips:
- Use a VPN when connecting to public networks
- Verify you’re connecting to legitimate networks, not spoofed access points
- Avoid accessing highly sensitive emails on public Wi-Fi
- Disable automatic Wi-Fi connections in public places
- Use cellular data for critical business communications when possible
Advanced Email Features and Customization
Beyond basic setup, iOS offers powerful email features that enhance productivity and streamline communication workflows. Mastering these advanced capabilities transforms your iPhone into a professional communication hub. ⚡
Creating Custom Email Signatures
Professional email signatures provide essential contact information and branding. iOS allows you to create unique signatures for each email account, ensuring appropriate messaging regardless of which account you’re using.
To create or edit signatures:
- Open Settings → Mail → Signature
- Choose “All Accounts” for a universal signature or “Per Account” for customization
- Enter your signature text, including name, title, company, and contact details
- Format text using the formatting toolbar (bold, italic, etc.)
- Keep signatures concise—4-6 lines maximum for mobile readability
Professional signature best practices:
- Include your full name and job title
- Add relevant contact information (phone, website)
- Keep formatting simple for cross-platform compatibility
- Avoid images or logos that may not display correctly
- Include legal disclaimers if required by your organization
Organizing with Mailboxes and Folders
Effective email organization prevents important messages from getting lost in cluttered inboxes. iOS Mail supports custom mailboxes and smart folders that automatically categorize your emails.
Create custom mailboxes:
- Open Mail app and tap “Mailboxes” at the top left
- Tap “Edit” then “New Mailbox”
- Name your mailbox and choose its location (on device or server)
- Use mailboxes to organize by project, client, or priority level
For sales professionals managing multiple prospects and campaigns, organized mailboxes help track conversations and ensure timely follow-ups. This organization complements cold email best practices by maintaining clear communication records.
Using Email Filters and Rules
While iOS Mail doesn’t support complex server-side rules, you can configure basic filtering through your email provider’s web interface. These rules automatically organize incoming messages, reducing manual sorting.
Common email rules for professionals:
- Move newsletters to a dedicated folder automatically
- Flag emails from VIP contacts for immediate attention
- Forward specific emails to team members or CRM systems
- Automatically archive emails from certain senders
- Mark emails containing specific keywords as important
Swipe Gestures for Quick Actions
iOS Mail supports customizable swipe gestures that speed up email management. Configure these gestures to match your workflow preferences.
To customize swipe options:
- Navigate to Settings → Mail → Swipe Options
- Choose actions for “Swipe Left” and “Swipe Right”
- Available actions include: Mark as Read, Flag, Move to Junk, Archive, and Delete
- Configure “Swipe Left Full” and “Swipe Right Full” for additional quick actions
| Gesture | Recommended Action | Use Case |
|---|---|---|
| Swipe Right | Mark as Read | Quick inbox clearing |
| Swipe Right Full | Archive | Remove from inbox while keeping |
| Swipe Left | Flag | Mark for follow-up |
| Swipe Left Full | Delete | Quick removal of unwanted emails |
Email Etiquette and Best Practices for Mobile
Sending emails from your iPhone requires attention to mobile-specific etiquette considerations. Understanding how can we write email effectively on mobile devices ensures professional communication even when you’re away from your desk. ✍️
Composing Professional Emails on iPhone
Mobile email composition presents unique challenges—smaller screens, touch keyboards, and potential distractions require adjusted approaches to maintain professionalism.
Mobile email composition tips:
- Keep it brief: Mobile emails should be concise and focused
- Use clear subject lines: Make the purpose immediately obvious
- Front-load important information: Put key points in the first paragraph
- Proofread carefully: Autocorrect errors undermine professionalism
- Consider timing: Avoid sending emails at inappropriate hours
- Use formatting sparingly: Bold and bullet points enhance readability
For longer, complex emails, consider drafting on your iPhone but reviewing on a computer before sending. This hybrid approach combines mobile convenience with desktop precision.
Managing Response Times and Expectations
Mobile email access creates expectations of rapid responses, but instant replies aren’t always possible or advisable. Set appropriate boundaries while remaining responsive to critical communications.
Response time strategies:
- Acknowledge receipt of important emails even if you can’t provide a full response immediately
- Use professional patience phrases when delays occur
- Set an auto-responder during vacations or intense focus periods
- Prioritize responses based on sender importance and message urgency
- Avoid the expectation of 24/7 availability by establishing communication boundaries
Attachment Handling on Mobile
Sending and receiving attachments on iPhone requires understanding iOS file management and email size limitations.
Attachment best practices:
- Use cloud links for large files: Share iCloud, Google Drive, or Dropbox links instead of direct attachments
- Compress images: iOS automatically offers size reduction options for photos
- Preview before sending: Verify attachments appear correctly
- Consider recipient limitations: Some email systems reject large attachments
- Use appropriate file formats: PDFs are universally accessible across devices
Integrating Email with Your Sales and Marketing Workflow
For business development professionals, email isn’t just communication—it’s a critical component of your lead generation and customer acquisition strategy. Optimizing your iPhone email setup supports broader sales and marketing objectives. 📊
Cold Email Campaign Management
While your iPhone isn’t the primary tool for launching cold email campaigns, mobile access enables real-time monitoring and rapid response to prospect engagement.
Mobile campaign management strategies:
- Monitor campaign performance metrics through integrated dashboards
- Respond quickly to prospect replies to maintain momentum
- Flag interested prospects for immediate follow-up
- Coordinate with team members on promising leads
- Adjust campaign parameters based on real-time feedback
Professional cold email automation platforms like Meetbound provide mobile-friendly interfaces that complement your iPhone email setup, allowing you to manage campaigns and track responses seamlessly across devices.
Lead Qualification on the Go
Quick lead qualification prevents opportunities from going cold. Your iPhone email setup should support rapid assessment of prospect interest and next-step determination.
Mobile lead qualification checklist:
- Review prospect responses for buying signals and interest indicators
- Check prospect websites and LinkedIn profiles directly from email links
- Add qualified leads to your CRM immediately
- Schedule follow-up calls or meetings while interest is high
- Share promising leads with appropriate team members
- Document key information in your CRM for context continuity
Coordinating with Marketing Automation
Modern marketing automation platforms track email engagement and trigger automated workflows based on prospect behavior. Understanding these systems helps you respond appropriately to automated campaign results.
Integration considerations:
- Recognize automated campaign emails in your inbox
- Understand which responses trigger automated follow-ups
- Know when to intervene personally versus letting automation continue
- Monitor unsubscribe requests and honor them immediately
- Coordinate manual outreach with automated sequences to avoid duplicate messaging
For teams exploring social media marketing integration, combining email with social outreach creates multi-channel engagement strategies that increase overall conversion rates.
Troubleshooting Email Recovery and Access Issues
Losing access to your email account can disrupt business operations and communication. Understanding recovery procedures and preventive measures protects against extended downtime. 🔐
Gmail Email Account Recovery
If you’re locked out of your Gmail account or need to recover access, Google provides multiple recovery options. Having recovery information configured in advance significantly simplifies this process.
Gmail recovery steps:
- Visit the Google Account Recovery page on your iPhone browser
- Enter your email address and click “Forgot password”
- Try your last remembered password
- Use recovery phone number or email for verification
- Answer security questions if configured
- Review recent account activity to verify your identity
For comprehensive guidance on gmail email account recovery and prevention strategies, ensure you have current recovery information on file with Google before issues occur.
Preventing Account Lockouts
Proactive measures prevent most email access issues before they occur. Regular maintenance and proper configuration keep your accounts accessible.
Prevention best practices:
- Keep recovery email addresses and phone numbers current
- Document app-specific passwords securely
- Regularly test your ability to access accounts
- Maintain backup access methods for critical accounts
- Review account security settings quarterly
- Keep iOS updated to avoid compatibility issues
Dealing with Compromised Accounts
If you suspect your email account has been compromised, immediate action minimizes damage and prevents further unauthorized access.
Immediate response steps:
- Change passwords immediately: Use a different device if possible
- Review recent activity: Check for unauthorized access or sent messages
- Enable two-factor authentication: Add additional security layers
- Review connected apps: Revoke access to suspicious third-party applications
- Notify contacts: Warn them about potential phishing emails from your account
- Scan devices for malware: Ensure your iPhone and computers are clean
- Monitor for identity theft: Watch for unusual account activity across services
Future-Proofing Your iPhone Email Setup
Email technology continues evolving with new security standards, protocols, and features. Staying informed about upcoming changes ensures your email setup remains functional and secure. 🚀
Emerging Email Security Standards
Email providers increasingly adopt advanced security measures that may require configuration updates. Understanding these standards helps you prepare for necessary changes.
Key developments to monitor:
- OAuth 2.0 adoption: More providers requiring modern authentication
- App-specific passwords: Traditional password access being phased out
- Enhanced encryption: Stronger TLS requirements for connections
- DMARC, DKIM, SPF: Advanced email authentication protocols
- Zero-trust security: Continuous verification replacing one-time authentication
Preparing for iOS Updates
Apple regularly updates iOS with new features and security enhancements. Major updates occasionally change email configuration processes or introduce new capabilities.
Update preparation strategies:
- Wait a few days after major iOS releases before updating
- Review release notes for email-related changes
- Backup email settings and account information before updating
- Test email functionality immediately after updating
- Keep alternative email access methods available during updates
Exploring Alternative Email Apps
While iOS Mail serves most users well, third-party email apps offer advanced features that may better suit specific professional needs.
Popular alternative email apps:
| App | Key Features | Best For |
|---|---|---|
| Outlook Mobile | Focused inbox, calendar integration, file attachment from cloud | Microsoft 365 users, business professionals |
| Gmail App | Smart replies, advanced search, multiple account support | Gmail power users, Google Workspace teams |
| Spark | Smart inbox, team collaboration, email scheduling | Team communication, collaborative workflows |
| Edison Mail | Assistant features, package tracking, bill management | Personal productivity, life management |
When evaluating alternative apps, consider privacy policies, data handling practices, and whether additional features justify switching from the native Mail app.
Conclusion: Mastering iPhone Email for Professional Success
Understanding how to add email account to iPhone is just the beginning of optimizing your mobile communication strategy. From basic setup through advanced features, security best practices, and workflow integration, your iPhone can become a powerful tool for managing professional communications effectively. 📱✨
Whether you’re configuring email with att net, setting up gmail email account create processes, managing my emails yahoo, or establishing godaddy and email for your business domain, the principles remain consistent: prioritize security, optimize for productivity, and integrate with your broader sales and marketing workflows.
For sales teams, marketing professionals, and business development representatives, mobile email access isn’t optional—it’s essential for maintaining momentum in competitive markets. Quick responses to prospects, real-time campaign monitoring, and seamless coordination with CRM inside sales tools separate successful professionals from those who miss opportunities.
Remember that email setup is not a one-time task but an ongoing process of optimization and maintenance. Regular security reviews, configuration updates, and workflow refinements ensure your email system continues serving your professional needs effectively.
Ready to take your email outreach to the next level? While proper iPhone email configuration keeps you connected on the go, professional cold email automation transforms how you generate leads and build business relationships. Visit Meetbound to discover how powerful automation, intelligent personalization, and data-driven insights can boost your reply rates and accelerate your lead generation efforts. Start automating your cold email campaigns today and watch your pipeline grow! 🚀
Article created using IntentRank